Skip to main content area
Home
  • English
  • Español
  • Get it
  • Build it
  • Use it
  • Blog
  • DiyouPCB
    • Get It
    • Build
    • Use
    • Improve
    • Gallery
    • Downloads
  • Contact
  • About us

TwinTeeth - Instalar la electrónica y el cableado

En este capítulo vamos instalar la electrónica y el cableado.

Spanish
  • Read more about TwinTeeth - Instalar la electrónica y el cableado

TwinTeeth - Instalar el sistema de movimiento

TwinTeeth utiliza dos sistemas de movimiento: el sistema de movimiento lineal y el sistema de movimiento delta.

El sistema de movimiento lineal desliza los carros arriba y abajo sobre los ejes de acero. El sistema de movimiento delta convierte dicho movimiento en movimiento delta que finalmente mueve la plataforma en un espacio cartesiano tridimensional.

A continuación vamos a instalar el sistema de movimiento lineal.

Spanish
  • Read more about TwinTeeth - Instalar el sistema de movimiento

TwinTeeth - Wiring the electronics

In this chapter we are going to wire the electronics.

English
  • Read more about TwinTeeth - Wiring the electronics

TwinTeeth - Ensamblar el Bastidor

Una vez hayas preparado los materiales es el momento de ensamblar el bastidor.

Ensamblando el Triángulo Inferior

Presionando con los dedos inserta el rodamiento F6900ZZ en el alojamiento del vértice

Spanish
  • Read more about TwinTeeth - Ensamblar el Bastidor

TwinTeeth - Installing the Motion System

TwinTeeth's motion system is composed of a linear motion system and a delta motion system.

The linear motion system moves the carriages up and down through the steel axes. The delta motion system converts the linear motion in delta motion which finally moves the platform in a Cartesian 3D space.

Now we are going to install the linear motion system.

English
  • Read more about TwinTeeth - Installing the Motion System

El Tutorial, la Lista de Materiales y la Plataforma de Fijación

Submitted by DIYouware on Tue, 03/10/2015 - 17:57

Durante las últimas tres semanas hemos estado trabajando duro en el tutorial. Hemos escrito y publicado algunos capítulos y seguimos escribiendo más. Ahora estamos trabajando en el capítulo de instalación de software y después comenzamos con el capítulo de calibración. Para escribirlos, hemos desmontado y montado el prototipo, y hemos aprovechado la oportunidad para cambiar algunas piezas antiguas que fueron impresas en diferentes colores. Ahora tiene un aspecto más elegante. Y todavía funciona! :-) Cada vez que la ensamblamos encontramos algunos trucos  para mejorar algo. Algunos de ellos los hemos publicado en el tutorial.

Por otro lado, nuestro almacén está de nuevo lleno de materiales. Por fin recibimos todo el material que necesitábamos para los kits y ya podemos volver a servirlos rápidamente. Nuestra granja de impresoras 3D está también imprimiendo todo el día.

Hemos recibido algunas preguntas sobre la lista de materiales del Pickup Driver. Dicha lista la exportamos directamente de Eagle CadSoft y en algunos componentes no está claro qué encapsulado es necesario. Así que aclararemos esto en los próximos días.

Hemos recibido también algunos emails preguntando por qué no vendemos la Plataforma de Fijación y dónde se puede comprar.

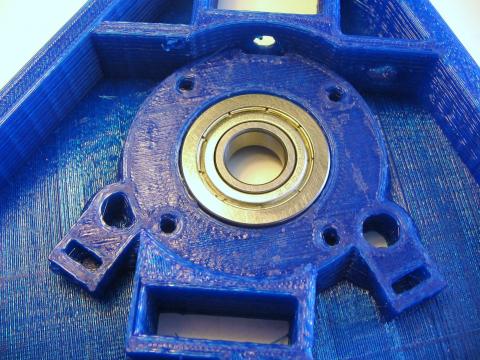
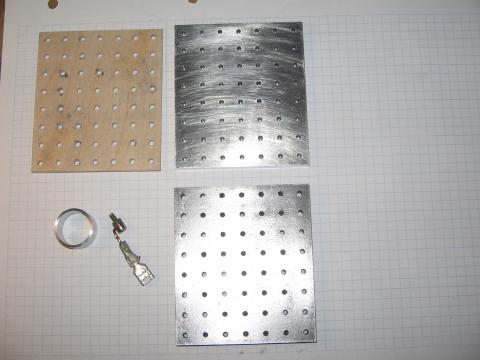
La Plataforma de Fijación es la pieza de aluminio dónde va sujeta la PCB o material que queremos trabajar. Realmente es todo un sistema de fijación compuesto de: una plantilla de taladrar, la propia plataforma y un pequeño tubo que la une al Effector. Incluye también un tornillo para conectar el cable en espiral. Y opcionalmente se puede añadir un contrachapado de sacrificio para proteger la plataforma al taladrar y un vidrio que se fija a la plataforma para imprimir en 3D.

La que hemos usado en el prototipo la hizo un amigo con una fresadora manual, pero para que salga rentable hay que fabricarla en serie con una fresadora CNC.

Pues bien, hace unas semanas contactamos con un proveedor y estamos haciendo pruebas para comprobar que la calidad del mecanizado y el precio son adecuados. Es muy importante que esté fabricada con precisión y sobre todo que los agujeros de la plantilla y de la plataforma casen perfectamente.

De todas formas si queréis fabricarla por vosotros mismos o encargarla a un tornero/fresador, hemos actualizado el fichero Autocad para incluir instrucciones más detalladas sobre su construcción. Podéis bajaros el nuevo fichero en la sección Obtenerla.

Si os surge alguna pregunta durante el montaje de TwinTeeth o sobre el tutorial no dudéis en enviarnos un email.

  • Read more about El Tutorial, la Lista de Materiales y la Plataforma de Fijación
  • Log in or register to post comments

Tutorial, BOM and Fixture Bed

Submitted by DIYouware on Tue, 03/10/2015 - 17:53

During last three weeks we have been working hard in the tutorial. We wrote some chapters and are still writing more. Now we are working on the software installation chapter and then we will begin with the calibration chapter. To write it, we disassembled the prototype and assembled again, and we seize the opportunity and we changed some old parts that were printed in different colours. Now it looks better. And it still works! :-) Every time we re-assemble it we find some tips to improve something. We published some of them in the tutorial.

On the other hand, our warehouse is now plenty of stock. We receive all the materials we needed and our 3D printing farm is also printing all the day.

We received some questions about the BOM of the Pickup Driver. We exported the BOM directly from Eagles CadSoft and in some devices it's not clear which package is needed. So we will clarify this in the following days.

We also received some emails asking why we do not sell the fixture bed and where it can be bought.

The fixture bed or platform is the piece of aluminium where we fix the PCB or material that we want to process. Really it is a complete fixing system composed of: a drilling stencil, the fixture platform and a small tube that attaches it to the Effector. It also has a screw to connect the spring cable. Optionally you can add a sacrifice plyboard for drilling and a glass to 3D print on it.

The fixture bed we have been using in the prototype was made by a friend using a manual milling machine. But to sell them at a reasonable price we need to find someone who manufactures it in series using a CNC milling machine.

Two weeks ago we contact a supplier and we are making some tests to check that the quality of the machining and the price is adequate. It is very important that it will be manufactured with precision: the holes of the platform and the stencil have to match perfectly and the dowel pins has to fit in the holes with minimal gaps.

Anyway, in case you want to make it by yourself or order it to a local milling company, we've updated the Autocad blue-prints to include detailed instructions about its construction.

You can download the new file at the Get it page.

If you have any other doubt about TwinTeeth assembling or the tutorial don't heasitate to contact us.


  • Read more about Tutorial, BOM and Fixture Bed
  • 2 comments
  • Log in or register to post comments

TwinTeeth - Assembling the Framework

Once all the materials have been prepared you can begin the assembly of the framework.

Assembling the Bottom Triangle

Insert the F6900ZZ ball bearing in its housing in the vertex.

English
  • Read more about TwinTeeth - Assembling the Framework

Guía de Construcción de TwinTeeth

Submitted by DIYouware on Fri, 03/06/2015 - 13:22

Acabamos de publicar el primer capítulo de la guía de construcción.

Lo podéis encontrar en la sección Construirla

La idea es publicar uno nuevo casi cada semana.

Es un trabajo duro porque lo redactamos en inglés y español. También tenemos que tomar fotos del proceso de montaje paso a paso. Hemos desmontado el prototipo para poder hacerlo porque no nos quedan piezas para construir uno nuevo: la semana pasada las vendimos todas. Y después tenemos que armar el prototipo de nuevo, le hemos cogido cariño. Afortunadamente es fácil de hacerlo. Lo hicimos tantas veces que podríamos hacerlo con los ojos cerrados.

De todos modos siempre es gratificante enseñar algo desde cero.

Al mismo tiempo estamos re-abasteciendo el almacén, supervisando la granja de impresoras 3D, preparando los pedidos de los clientes de la semana pasada, buscando nuevos proveedores, respondiendo a mensajes de correo electrónico, etc.

Por favor, no montar TwinTeeth demasiado rápido: dejadnos algo de tiempo para terminar el tutorial. :-)


Diyouware Team.


  • Read more about Guía de Construcción de TwinTeeth
  • Log in or register to post comments

TwinTeeth building guide

Submitted by DIYouware on Thu, 03/05/2015 - 21:02

We have just published the first chapter of the building guide.

Please take a look at it, in the Build it section.

Our plan is to publish a new chapter almost every week.

It is a hard work because we are writing the tutorial in English and Spanish. We also have to take pictures of the assembling process step by step. We have disassembled the prototype because we don't have pieces to build a new one: last week we sold all our stock. And after that we have to assemble the prototype again. Fortunally it's easy to do it. We did it so many times that we could do it standing in our heads.

Anyway always is grateful to teach something from scratch.

At the same time we are re-sourcing our warehouse stock, supervising our 3D printer farm, preparing last-week customer orders, looking for new suppliers, answering emails, etc.

Please don't assemble TwinTeeth too fast: let us time to finish the tutorial. :-)


  • Read more about TwinTeeth building guide
  • Log in or register to post comments

Pages

  • « first
  • ‹ previous
  • …
  • 3
  • 4
  • 5
  • 6
  • 7
  • 8
  • 9
  • 10
  • 11
  • …
  • next ›
  • last »

(c) 2013 Diyouware.com