Skip to main content area
Home
  • English
  • Español
  • Get it
  • Build it
  • Use it
  • Blog
  • DiyouPCB
    • Get It
    • Build
    • Use
    • Improve
    • Gallery
    • Downloads
  • Contact
  • About us

Madrid Maker Faire

Submitted by DIYouware on Thu, 04/23/2015 - 12:08

This week we have't got time to write chapters of the tutorial because we have been invited to show TwinTeeth at the Madrid Mini Maker Faire. It is organized by Make magazine and the fantastic guys of eoodescubre. So we are very excited and busy preparing all the stuff to show what TwinTeeth can do. If you want to attend the event you will be welcome.

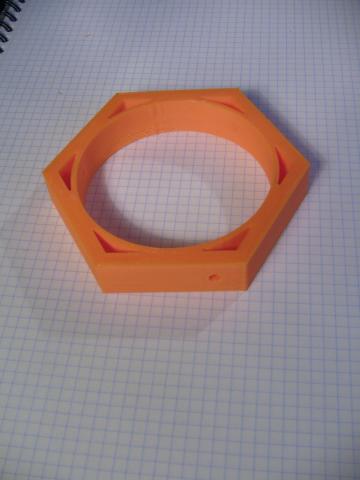
We want to show the best of TwinTeeth at the fair, so we designed new accessories: a filament Spool Holder and a Glass Support, both for 3D printing ToolHead. We will share the .stl files as soon as possible.

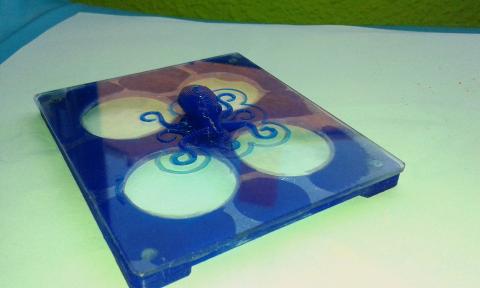
Here is the glass support with a 3D octopus on it:

We have also found some bugs!

Yes, minor firmware defects which affected g-code parsing speed. They are already corrected and we will publish the new version probably next week.

More news:

We have finally reached an agreement with a metal artisan to make the aluminium platform kit for TwinTeeth. 

He already finished the testing phase and we will do the proof of testing at the faire.

The kit is composed by:

  • 1 PC aluminium 70x80x5mm platform
  • 1 PC Round stainless steel tube 20mm OD
  • 1 PC aluminium 70x80x10mm template
  • 8 PCs 2.5 x 8 mm precision pin
  • 8 PCs 2.5 x 6 mm precision pin

The platform is CNC drilled with 56 x 2.5mm ID precision holes. On the back side it’s milled to fit the 20mm OD tube. The template is just drilled with the 56 holes. It is used for drilling the four PCB holes and attach it to the platform with the pins.

This kit is only available upon request because we can not accept too many orders at a time. The artisan has other jobs and he can only produce some units per week.

If you are interested, please send us an e-mail.

  • Read more about Madrid Maker Faire
  • Log in or register to post comments

TwinTeeth - Ensamblar el cabezal láser

Seguridad lo primero

El cabezal láser utiliza un pickup de HD-DVD: el PHR-803T. Este pickup óptico tiene tres diodos láser de clase 3B: uno es un diodo láser ultravioleta (405nm), otro es un diodo de láser rojo (650nm) y el último un diodo láser infrarrojo (780nm). El láser infrarrojo no es visible para el ojo humano.

Spanish
  • Read more about TwinTeeth - Ensamblar el cabezal láser

Cabezal del Microscopio

Submitted by DIYouware on Thu, 04/09/2015 - 13:48

Estamos muy ocupados escribiendo el tutorial y con la tienda, pero algunos días tenemos un minuto para pensar en nuevas aplicaciones de TwinTeeth y escribirlas en el blog, claro. Hoy ha sido un día de estos.

Esta mañana estaba inspeccionando una PCB con un microscopio y pensé: ¿Por qué no usarlo con TwinTeeth. Es uno de esos microscopios USB baratos, de mala calidad, que se pueden encontrar en ebay, pero útil para ver objetos pequeños.

Así que diseñé un nuevo cabezal y lo imprimí. Aquí está:

Luego instalé el nuevo cabezal en TwinTeeth y conecté el microscopio a mi ordenador.

También tomé estas fotos y escribí esta entrada de blog.

Hice todas esas cosas en una hora. !Este es el poder de la impresión 3D y la capacidad de ampliación de TwinTeeth!

Ahora la pregunta es: ¿Es útil?

Creo que es bastante útil. Ahora puedo enfocar el microscopio con precisión moviendo el eje Z. El bastidor original del microscopio era de juguete sin ninguna precisión. También puedo mover manualmente el punto de enfoque en las dimensiones X/Y y mantener el foco porque la auto-nivelación de la plataforma funciona realmente bien. También podría escribir programas g-code para inspeccionar cosas automáticamente. Incluso reconocer patrones visuales utilizando el software apropiado y detectar fallos en PCBs. También tomar fotografías en esos lugares o hacer películas a nivel microscópico.

Aquí algunos ejemplos:
 

Así pues, tenemos un nuevo cabezal: el Cabezal del Microscopio.

Si alguien quiere el archivo .STL para imprimirlo en 3D, no dudeis en poneros en contacto conmigo.

  • Read more about Cabezal del Microscopio
  • Log in or register to post comments

Microscope ToolHead

Submitted by DIYouware on Thu, 04/09/2015 - 13:06

We are very busy writing the tutorial and managing the shop but some days we have a minute to think about new TwinTeeth applications and write them in blogs entries like this. Today was one of these days.

This morning I was inspecting a PCB with a microscope and I thought: why not use it on TwinTeeth? It is one of those cheap, bad quality, USB microscopes you can find at ebay, but useful to see tiny objects.

So, I designed a new ToolHead hexagon and 3D printed it. Here it is: 

Then I installed the new ToolHead on TwinTeeth and connected the microscope to my computer.

I also took these pictures and wrote this blog entry.

I did all those things in one hour. This is the power of TwinTeeth extendibility and 3D printing!

How useful is it?

I think it is quite useful. Now I can focus the microscope with precision moving the Z axis. The original microscope framework was a toy without any precision. I can also move manually the focus point on the X/Y dimensions and maintain the focus because the bed auto-levelling works really fine. I could also write g-code programs for inspecting things automatically. Even recognize visual patterns using the appropiate software and detect PCB failures. Also take pictures on those locations or make microscopic movies.

Here are some examples:

So, we have a new ToolHead: the microscope ToolHead.

If someone wants the .STL file to 3D print it, don't hesitate to contact me.

  • Read more about Microscope ToolHead
  • 1 comment
  • Log in or register to post comments

TwinTeeth - Assembling the Laser ToolHead

Safety first

The Laser ToolHead uses a PHR-803T HD-DVD pickup. It has three class 3B laser diodes: one is a ultraviolet laser diode (405nm), another is a red laser diode (650nm), and the last one an infrared laser diode (780nm). Infrared laser is not visible for the human eye.

English
  • Read more about TwinTeeth - Assembling the Laser ToolHead

TwinTeeth - Calibrar el robot

En este capítulo vamos a encender y calibrar el robot. Por favor lee antes los siguientes consejos de seguridad.

Spanish
  • Read more about TwinTeeth - Calibrar el robot

TwinTeeth - Calibrating the robot

In this chapter we are going to power up and calibrate the robot. Please read the next safety advice before.

Safety first

Some electronic components used by TwinTeeth (motor drivers, Mosfet drivers, power supply regulators, etc.) generate heat. Some of them use an aluminium radiator that can burn your skin when you touch it. Please, take care and keep them away from flammable materials.

English
  • Read more about TwinTeeth - Calibrating the robot

Hacking the PHR-803T

English

One day we were playing with a Xbox blu-ray sled trying to turn the laser on and we thought: could the blu-ray laser be used to print circuit boards?. The sled has a UV laser diode and maybe we can sensitize Dry-Film or presensitized boards with it.

Tags: 
PHR-803T
PHR803T
blu-ray
UV diode
  • Read more about Hacking the PHR-803T

TwinTeeth - Instalar el software

Instalando el software

Atención: No conectes todavía la fuente de alimentación.

Spanish
  • Read more about TwinTeeth - Instalar el software

TwinTeeth - Installing the software

Installing the software

Warning: Do not connect the power supply yet.

In this chapter we are only going to upload the firmware on the Arduino and you can do that just connecting the USB cable to it.

English
  • Read more about TwinTeeth - Installing the software

Pages

  • « first
  • ‹ previous
  • …
  • 2
  • 3
  • 4
  • 5
  • 6
  • 7
  • 8
  • 9
  • 10
  • …
  • next ›
  • last »

(c) 2013 Diyouware.com